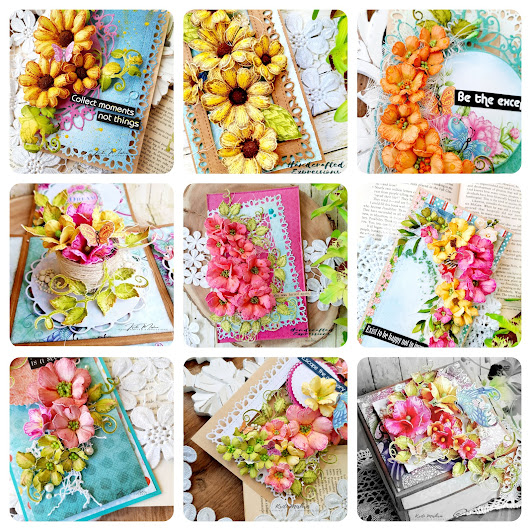
Namaste Friends!!
This is Kriti Mishra...Today I am over at Itsy Bitsy blog....Thank you so much Rashmi and the entire team for this wonderful opportunity...
I got Little Birdie's Gold Alcohol Splash in my Guest DT kit. So, today I have few projects to share with you all about my experience with these.

FIRST PROJECT
Sharing my process and results of playing with Gold Alcohol Splash for the first time on glossy photo paper. I have selected this because it's the back of the glossy photo paper that is waterproof and has a smooth texture.
1. So, on the back side of the photo paper, firstly I put few drops of Frosted Pool Gold Alcohol Splash.
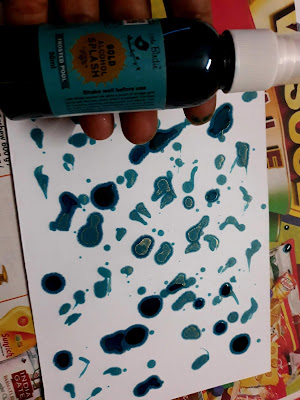
2. Next, added few drops of Midnight Blue Gold Alcohol Splash.

3. After that, I sprinkled some blending solution, and the chemical reaction happened, and I got this beautiful pattern on the glossy side of the photo paper.

4. I cut this paper using Little Birdie's cross stitched rectangle dies.

5. Finally, I made two beautiful cards out of these. Aren't these beautiful.So a BIG YES for PHOTO PAPER. I have Itsy Bitsy's Wooden Disc as my photo prop.


SECOND PROJECT
In my next project I tried these spray over an old glass jar. This was not only super easy to make but also very cost effective as I transformed a simple old dull looking jar into gorgeous high- end looking piece.
1. Wash and dry the jar, and then wipe it with blending solution.

2. Dip the brush into the spray bottle of Frosted Pool and Midnight Blue Gold Alcohol Splash and brush onto the jar one by one.

3. Hold the jar upside down so that ink will flow downwards and after drying it will give you a beautiful pattern.

4. Lastly, I applied mod- podge over it as a sealant and used as a planter for my kitchen platform. So, a BIG YES for GLASS too.


THIRD PROJECT
This time, I used these sprays to make silk foam flowers....and my experience was awesome. I cut few flowers from the silk foam using Little Birdie's Thin Cut Flower dies.
1. I poured some ink form the bottle and added some blending solution to it. After that, rubbed the flowers over the ink. I have used Frosted Pool Gold Alcohol Splash, Citron Breeze Gold Alcohol Splash and Pink Punch Gold Alcohol Splash.


2. Next, twist the leaves firmly between the palms.

3. Now, open them from the lower end safely and lightly (as sometimes, it may tear, if we put pressure) and leave the upper portion twisted only.....Repeat this with all the leaves.

4. Assemble the flowers using Little Birdie's Silicon Glue. I have used pearls from the Itsy Bitsy as the center for my flowers.


5. Finally, they are looking like this. So a BIG YES for SILK FOAM/ FOAMIRAN also.


FOURTH PROJECT
Lastly, I made a mixed media canvas using these gold alcohol splash.
1. I took a 6" x 8" canvas and primed it with gesso.

2. Next, I have applied Little Birdie's Mixed Media Paste over the canvas using Little Birdie's Brick and Script Stencil. Sprinkled some real sand over bricks to give some natural effect to the bricks.


3. Now, the most interesting part, I played with few shades of alcohol splash and blended them with Little Birdie's Blending Solution. The shades I have used here are Frosted Pool Gold Alcohol Splash, Citron Breeze Gold Alcohol Splash, Golden Mocha Gold Alcohol Splash and Pink Punch Gold Alcohol Splash to get the desired background.

4. Next cut some fern from the Little Birdie's Tropical Fern Dies.

5. Finally, my canvas is looking like this. I have used Little Birdie's Mixed Media Stones, Wooden slices, Chipboard Shapes-- Butterfly, Sisal Fiber-- Natural, Coconut Fiber -- Black to adorn my canvas. To paste these I have used Little Birdie's Heavy Gel Medium.


So, finally I want to say that it is a very versatile product, we can use them at different mediums.So, it is a must have product.
Supplies used:
Gold Alcohol Splash 50 ml - Midnight Blue
Gold Alcohol Splash 50 ml - Frosted Pool
Gold Alcohol Splash 50 ml - Citron Breeze
Gold Alcohol Splash 50 ml - Pink Punch
Gold Alcohol Splash 50 ml - Golden Mocha
Alcohol Blending Solution -50ml
Thin Cut Dies - Cross Stitched Rectangle
Thin Cut Die - Flowers
Thin Cut Dies - Tropical Fern
Unfinished Wooden Discs- Natural 24pcs
Wooden Disc -177mmx10mm, 1pc
Silicon Liquid Glue - 30ml
Pearl Beads 5mm,20gm - Plastic, White
Pearl Beads 6mm,20gm - Plastic, White
Pearl Beads 8mm,20gm - Plastic, White
Mixed Media Paste 2 In 1 -White 400gm
Stencil Brick -7.3x 9.7Inch, 1 Piece
Stencil Script -7.3x 9.7Inch, 1 Piece
Mixed Media Stone- 80gm
Chipboard Shapes- Butterfly
Sisal Fibre 30gm- Natural
Coconut Fibre 15gm- Black
Acrylic Heavy Gel-Matte
I hope you like my projects!!
Kriti Mishra
This is Kriti Mishra...Today I am over at Itsy Bitsy blog....Thank you so much Rashmi and the entire team for this wonderful opportunity...
I got Little Birdie's Gold Alcohol Splash in my Guest DT kit. So, today I have few projects to share with you all about my experience with these.

FIRST PROJECT
Sharing my process and results of playing with Gold Alcohol Splash for the first time on glossy photo paper. I have selected this because it's the back of the glossy photo paper that is waterproof and has a smooth texture.
1. So, on the back side of the photo paper, firstly I put few drops of Frosted Pool Gold Alcohol Splash.

2. Next, added few drops of Midnight Blue Gold Alcohol Splash.

3. After that, I sprinkled some blending solution, and the chemical reaction happened, and I got this beautiful pattern on the glossy side of the photo paper.

4. I cut this paper using Little Birdie's cross stitched rectangle dies.

5. Finally, I made two beautiful cards out of these. Aren't these beautiful.So a BIG YES for PHOTO PAPER. I have Itsy Bitsy's Wooden Disc as my photo prop.


SECOND PROJECT
In my next project I tried these spray over an old glass jar. This was not only super easy to make but also very cost effective as I transformed a simple old dull looking jar into gorgeous high- end looking piece.
1. Wash and dry the jar, and then wipe it with blending solution.

2. Dip the brush into the spray bottle of Frosted Pool and Midnight Blue Gold Alcohol Splash and brush onto the jar one by one.

3. Hold the jar upside down so that ink will flow downwards and after drying it will give you a beautiful pattern.

4. Lastly, I applied mod- podge over it as a sealant and used as a planter for my kitchen platform. So, a BIG YES for GLASS too.


THIRD PROJECT
This time, I used these sprays to make silk foam flowers....and my experience was awesome. I cut few flowers from the silk foam using Little Birdie's Thin Cut Flower dies.
1. I poured some ink form the bottle and added some blending solution to it. After that, rubbed the flowers over the ink. I have used Frosted Pool Gold Alcohol Splash, Citron Breeze Gold Alcohol Splash and Pink Punch Gold Alcohol Splash.


2. Next, twist the leaves firmly between the palms.

3. Now, open them from the lower end safely and lightly (as sometimes, it may tear, if we put pressure) and leave the upper portion twisted only.....Repeat this with all the leaves.

4. Assemble the flowers using Little Birdie's Silicon Glue. I have used pearls from the Itsy Bitsy as the center for my flowers.


5. Finally, they are looking like this. So a BIG YES for SILK FOAM/ FOAMIRAN also.


FOURTH PROJECT
Lastly, I made a mixed media canvas using these gold alcohol splash.
1. I took a 6" x 8" canvas and primed it with gesso.

2. Next, I have applied Little Birdie's Mixed Media Paste over the canvas using Little Birdie's Brick and Script Stencil. Sprinkled some real sand over bricks to give some natural effect to the bricks.


3. Now, the most interesting part, I played with few shades of alcohol splash and blended them with Little Birdie's Blending Solution. The shades I have used here are Frosted Pool Gold Alcohol Splash, Citron Breeze Gold Alcohol Splash, Golden Mocha Gold Alcohol Splash and Pink Punch Gold Alcohol Splash to get the desired background.

4. Next cut some fern from the Little Birdie's Tropical Fern Dies.

5. Finally, my canvas is looking like this. I have used Little Birdie's Mixed Media Stones, Wooden slices, Chipboard Shapes-- Butterfly, Sisal Fiber-- Natural, Coconut Fiber -- Black to adorn my canvas. To paste these I have used Little Birdie's Heavy Gel Medium.


So, finally I want to say that it is a very versatile product, we can use them at different mediums.So, it is a must have product.
Supplies used:
Gold Alcohol Splash 50 ml - Midnight Blue
Gold Alcohol Splash 50 ml - Frosted Pool
Gold Alcohol Splash 50 ml - Citron Breeze
Gold Alcohol Splash 50 ml - Pink Punch
Gold Alcohol Splash 50 ml - Golden Mocha
Alcohol Blending Solution -50ml
Thin Cut Dies - Cross Stitched Rectangle
Thin Cut Die - Flowers
Thin Cut Dies - Tropical Fern
Unfinished Wooden Discs- Natural 24pcs
Wooden Disc -177mmx10mm, 1pc
Silicon Liquid Glue - 30ml
Pearl Beads 5mm,20gm - Plastic, White
Pearl Beads 6mm,20gm - Plastic, White
Pearl Beads 8mm,20gm - Plastic, White
Mixed Media Paste 2 In 1 -White 400gm
Stencil Brick -7.3x 9.7Inch, 1 Piece
Stencil Script -7.3x 9.7Inch, 1 Piece
Mixed Media Stone- 80gm
Chipboard Shapes- Butterfly
Sisal Fibre 30gm- Natural
Coconut Fibre 15gm- Black
Acrylic Heavy Gel-Matte
I hope you like my projects!!
Kriti Mishra