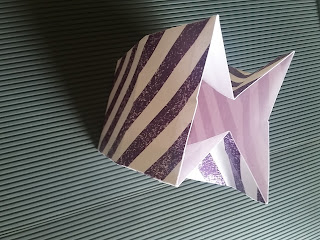
Why purchase gift boxes when you can make your own? Making gift boxes is fun. It’s super easy to learn how to make a cute gift boxes out of scrapbook paper.
To honour the small gifts in life, here is a really cool tutorial on how to wrap up your awesome heart-felt gift with something handmade, your own DIY gift box from scrapbook paper.
This is turned into one of my favourite little projects to do because not only is it quick, but it’s personalized, hand-crafted, a beautiful work of art that will be remembered way beyond the day that you give the gift. Extra bonus...making your own gift box will cost you much less than a roll of wrapping paper at the store! Unique and cheap...who could ask for anything more?
Tutorial for Fold over Paper bag
- Take a piece of scrapbook paper ( 10" x 12") and score at 5- 3/4" and 11-1/2" on the long side.
- Paste as shown in the picture with glue. Allow it to dry for some time.
- Score both sides at 1" and fold it. The thickness of the fold will determine the space inside the bag and this will become the width of the bag, so accordingly score the paper from both sides.
- Open the folds and along the creases made fold inwards on both the sides as shown.
- Fold the bottom of the bag for a length of around 1-1/2". This will depend on the size of the bag you are making.
- Unfold the last fold made. Along the side crease, fold inwards to form a triangular shaped edge.Fold the flap inwards and flatten it as shown below. Paste the two flaps together using glue and press so that the base is firm.
- Now moving on to the top, fold the top of the bag for a length of around 2", open it and pinch inside from both the sides and fold it over again. I had put brown colour cardstock over it for colour co-ordination.
- Your fold over bag is ready, embellish it accordingly.
Tutorial for Milk Carton Paper bag
- Take a piece of scrapbook paper (10-1/2" x 7"), score at 2-1/2", 5", 7- 1/2" and 10" on the long side.
- Turn the paper 90 degrees and score at 2- 1/2", 5", 6- 1/2".
- Fold and crease all the score lies.
- Cut along the score lines from the base of your paper upto the 2-1/2" mark to make the flaps which will form the bottom of your box.
- Next cut away the narrow side tab as shown in the picture.
- Fold the paper and glue the side tab down.
After that it will look like this
- Apply glue to the top of 3 of the bottom flaps. Fold each one on top of each other to form the base. The one without any glue should be the last flap to fold down.
- Now gently pinch in the sides from the top, and close it using mini peg, wooden peg, washi tape or ribbon.
- Milk carton paper bag is ready.
So I made two favour bags/boxes, hope you get inspired
Tip:- To get the right thickness, use can use high gsm plain cardstock also and later you can adhere scrapbook paper over it. It makes your box sturdy.
Personalize the labels with your own message.
Even though it’s a plain design, you can dress it up with more embellishments to make it look more sparkly & special.
Kriti Mishra


No comments:
Post a Comment